
There are many strategic or legal reasons why a business may not want to sell to the general public. If you’ve restricted your store to registered users, you may wish to allow visitors to apply to gain access to your store.
This article will show you how to capture and manage customer account applications without needing a complicated (and probably expensive) plugin.
Step 1 — Create Customer User Roles
Use a WordPress user role management plugin to create two new user roles. We recommend PublishPress Capabilities, but any similar plugin will do.
Create the following user roles:
- Pending Customer (with the slug pending_customer)
- Rejected Customer (with the slug rejected_customer)
If you’re using PublishPress Capabilities, new roles can be added from the Roles option added to the menu.
Next, edit the capabilities for these newly created roles. You’ll want to uncheck everything offered, as you don’t want unapproved or rejected applicants to be able to do anything besides log in.
Once you’ve finished adding roles and modifying their capabilities, you can disable or remove PublishPress Capability. The changes are stored in your database and don’t require the plugin to be active.
Step 2 — Assign new users to the Pending Customer role
The following snippet will ensure all new account registrations will be placed into the “Pending Customer” role that you created. You can either add this to your theme’s Functions.php file, create an MU plugin, or use the Code Snippets plugin.
//Make sure new customers are placed in the pending_customer role
function launchwoo_new_customer_data($new_customer_data){
    $new_customer_data['role'] = 'pending_customer';
    return $new_customer_data;
}
add_filter( 'woocommerce_new_customer_data', 'launchwoo_new_customer_data');
Step 3 – Create the application form
You can use the default WooCommerce user signup screen, but I find the user experience to be better when there’s a clear “Account Application” page.
I’m a big fan of the Simple Registration for WooCommerce plugin. Just install it, then create a new page called “Account Application” and then insert the [woocommerce_simple_registration] shortcode. That’s it, you’re done!
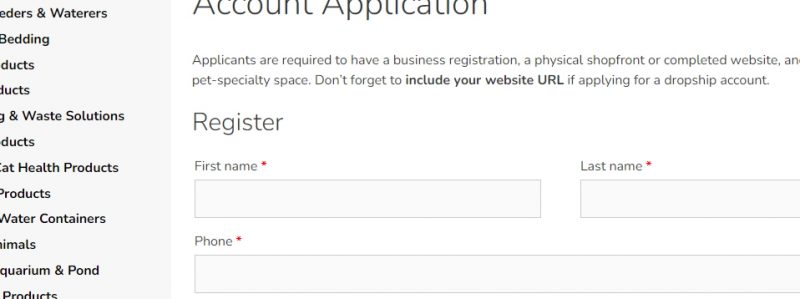
If you’ve made any changes to your WordPress user profile fields, they’ll be reflected in this signup form. That makes it easy to add custom questions to your application.
Step 4 – Prevent guests from ordering
You don’t need any code or plugins to achieve this—it can all be done with WooCommerce’s settings.
Navigate to WooCommerce -> Settings -> Accounts & Privacy and uncheck the “Allow customers to place orders without an account” option.
You may also want to disable account creation from the My Account and Checkout pages to force them to use your application form.
The settings should look like this:
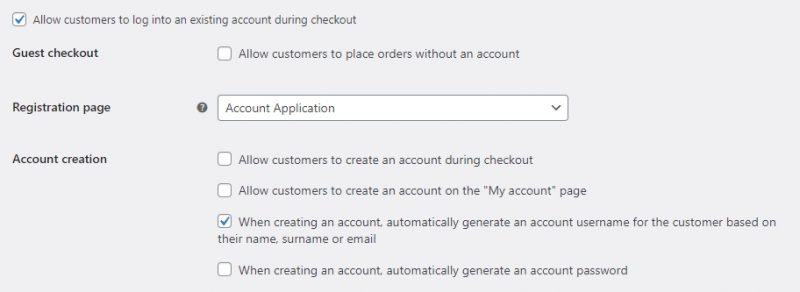
Don’t forget to assign your newly-created account application page as WooCommerce’s default registration page as well.
Step 5 – Approving or rejecting applicants
Approving or rejecting applicants is extremely easy. Edit their user profile and change their role from Pending Customer to either Customer or Rejected Customer.

As WordPress allows users to have multiple roles, you’ll need to remove the Pending Customer role (by clicking the little X) after adding the new role.
Step 6 – Notification Emails
This is once again achieved with a few simple code snippets added to a Functions.php, MU plugin, or Code Snippets.
New User Application email
As you’ll need to manually approve/reject each customer application, it’s handy to get an email notification when a new one comes through.
//Send an email to someone when a customer registers.
function launchwoo_registration_email_alert( $user_id ) {
    $user    = get_userdata( $user_id );
    $email   = $user->user_email;
    $headers = array('Content-Type: text/html; charset=UTF-8');
    $message = "Hello, \n" . $email . " has applied to your store. \nYou can view this customer's details by clicking <a href='https://www.example.com/wp-admin/user-edit.php?user_id=". $user_id . "'>here</a>" ;
    wp_mail( 'person@example.com', "New User Application", $message, $headers );
}
add_action('user_register', 'launchwoo_registration_email_alert');
You’ll of course need to add your own domain name and email address to the code to make it work.
Application rejected email
It’s only polite to let applicants know when you’ve rejected them. This snippet will send an email to a user whenever you change their role from Pending Customer to Rejected Customer
//Email customers when we've rejected their application
function launchwoo_email_rejected_applicant( $user_id, $new_role ) {

      if ($new_role == 'rejected_customer') {
            $user_info = get_userdata( $user_id );
            $to = $user_info->user_email;
            $subject = "Your account application has been rejected.";
            $message = "Hi " .$user_info->display_name . ", unfortunately your account application has been unsuccessful.";
            $headers = array('Content-Type: text/html; charset=UTF-8');
            wp_mail($to, $subject, $message, $headers);
      }
}
add_action( 'add_user_role', 'launchwoo_email_rejected_applicant', 10, 2);
Account approved email
Just use the above snippet, but replace “rejected” in the function name and action to “approved”, and replace ($new_role == ‘rejected_customer’) with ($new_role == ‘customer’).
Step 7 – Prevent pending/rejected customers from logging in
Obviously, you don’t want pending or rejected customers to be able to access your store and place orders. The easiest way to do this is to log them out every time they try to login to your site.
We can achieve this will the following code snippet.
//Helper function to return the role of a specific user
function launchwoo_get_user_roles_by_user_id( $user_id ) {
    $user = get_userdata( $user_id );
    return empty( $user ) ? array() : $user->roles;
}
//Helper function to determine if a user has a role
function launchwoo_is_user_in_role( $user_id, $role  ) {
    return in_array( $role, launchwoo_get_user_roles_by_user_id( $user_id ) );
}
//Check the user's role. Logout and redirect if they're pending or rejected
function launchwoo_logout_user() {

    if ( launchwoo_is_user_in_role(get_current_user_id(),"pending_customer") ) {
       wp_logout();
    }
     if ( launchwoo_is_user_in_role(get_current_user_id(),"rejected_customer") ) {
       wp_logout();
    }
}
add_action('get_header', 'launchwoo_logout_user');
You can use a logout redirect plugin or snippet to redirect pending or rejected users to an explanation of why they’ve been logged out.
Optional: Hide pricing from guests
The following snippet will hide store pricing for logged-out users.
//Only show price for members
add_filter('woocommerce_get_price_html','launchwoo_members_only_price');
function launchwoo_members_only_price($price){

    global $wp;
$current_url = home_url(add_query_arg(array(), $wp->request));

if(is_user_logged_in() ){
    return $price;
}
else return '<a href="'.  wp_login_url( $current_url ).'">Login</a> to view prices';
}
And finally
Let us know if this worked for you! We’d love to hear about your use-cases for creating a customer approval system in the comments section below.
Hello,
very nice. Working on a custom B2B system and it works perfectly.
In Step 7 “Prevent pending/rejected customers from logging in” I would like to achieve, that after immediatly after login/logout:
– the pending customer is redirected to a custom page/URL (Your application is pending)
– the rejected customer is redirected to a custom page/URL (Your application has been rejected. Please, send us an email for …)
I tried to do it via PublishPress Capabilities Login and Logout Redirect but somehow it does not work.
Thank you in advance for any hint.
Hello. This should help:
//Login redirect

function launchwoo_custom_redirect( $redirect, $user ) {
// Get the first of all the roles assigned to the user
$role = $user->roles[0];
if ( $role == 'pending_customer' ) {
$pending_customer_redirect = 'https://www.example.com/account-pending/';
$redirect = $pending_customer_redirect;
} elseif ( $role == 'expired_customer' ) {
$expired_customer_redirect = 'https://www.example.com/account-disabled/';
$redirect = $expired_customer_redirect;
} elseif ( $role == 'rejected_customer' ) {
$rejected_customer_redirect = 'https://www.example.com/application-declined/';
$redirect = $rejected_customer_redirect;
} else {
//Redirect any other role to the previous visited page or, if not available, to the homepage
$redirect = wp_get_referer() ? wp_get_referer() : home_url();
}
return $redirect;
}
add_filter( 'woocommerce_login_redirect', 'launchwoo_custom_redirect', 10, 2 );
This redirects the user on login. When combined with the code in the article, the user will be logged out at the same time as they are redirected to the appropriate feedback page.
Hi Shane,
This seems to be the work around that I want, unfortunately I get a critical error when submitting the standard Woocommerce registration form. The applicant does appear in the user admin section with “pending_customer” status. Upon changing the status to “customer” or “rejected customer” the critical error happens again. My feeling that something goes wrong when sending messages, any hints?
Any response is much appreciated, Thanks, JW
There was an error with the “Email customers when we’ve rejected their application” code snippet, please try copy/pasting it again.